Install with CRNA
Step1 - Install
npm install react-native-cloud-store
Step2 - Link
For ReactNative 0.60+
Autolink was used, go to step 3 now
For ReactNative <0.60
npx react-native link react-native-cloud-store
Step3 - Setup
For Android
Not supported
For IOS
Run
npx pod-installin your project rootOpen your
iosfolder using XCodeBecause this module was written by
swift, you need to create an empty swift file and a bridge header file in xcode:File->New->File-> Choose 'Swift File' and Click NextSave and create file, then xcode will prompt you to create an Objective-C bridging header, select "Create Briding Header"
dangerDon't delete the created empty swift file!
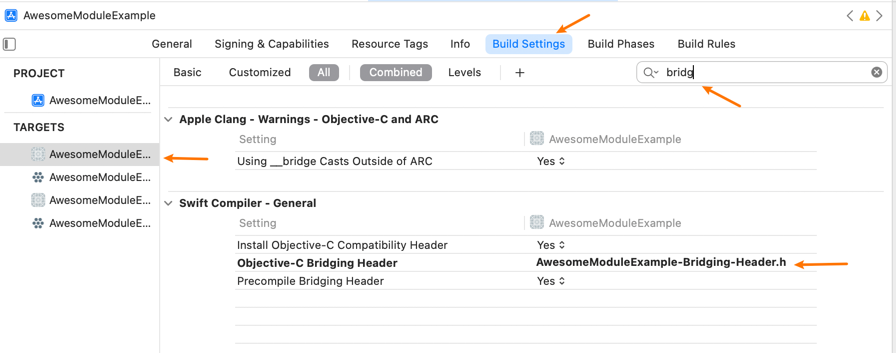
If you are not prompt to create briding header file, you can manually create a .h file and set header location as below (filename not matter):
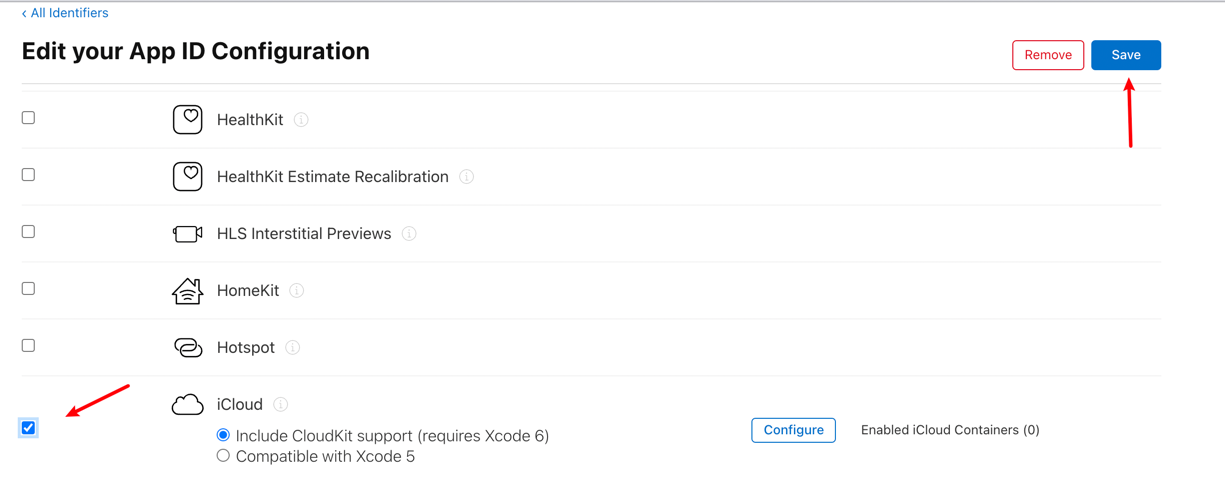
Next step is add iCloud capability:
Go to developer account website and make sure your app identifier enabled iCloud:
Back to XCode, select your target ->
Signing & Capabilitiestab -> click "+ Capability" -> search and add "iCloud" just live below: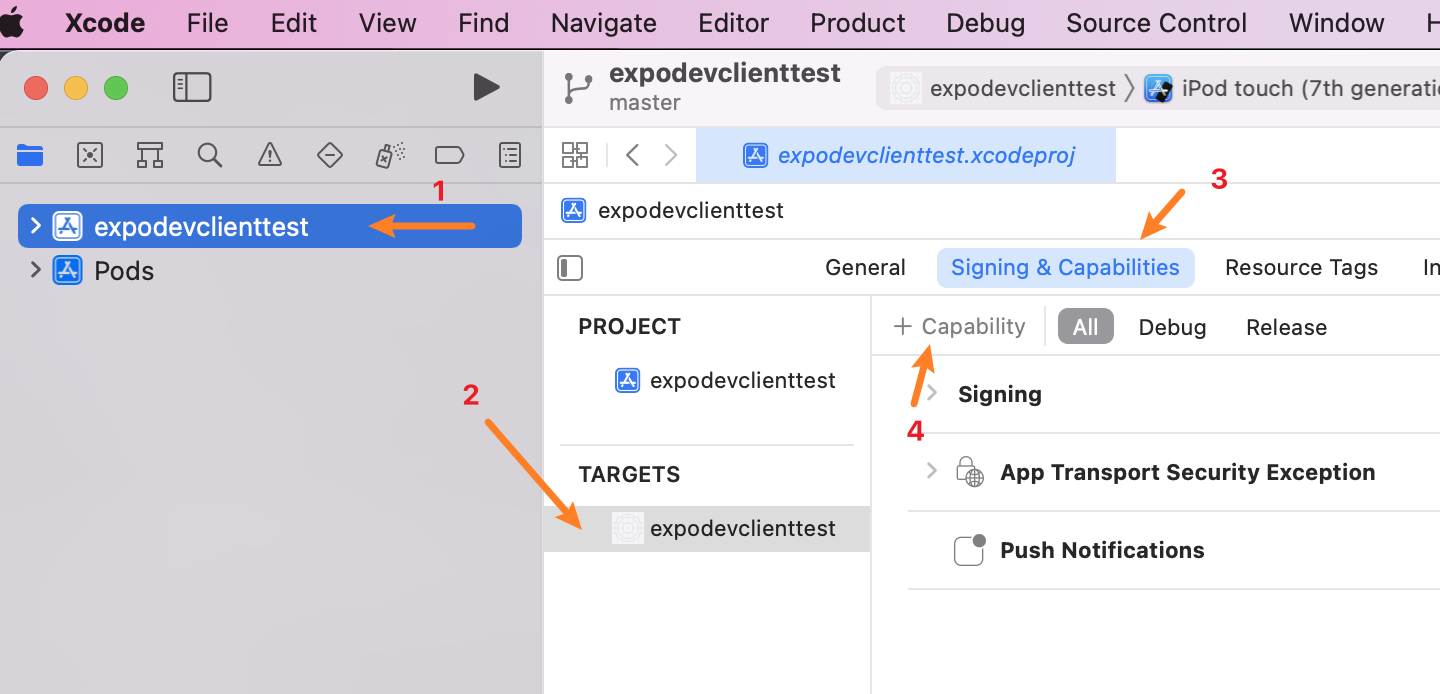
then scroll to iCloud settings part: if you use key-value storage check
Key-value storage, if you use iCloud documents checkiCloud Documentsand then select or create a container(Optional Step) If you want to make your iCloud container's
Documentsfolder visible to user, openInfo.plistand change as the following:<key>NSUbiquitousContainers</key>
<dict>
<key>[THIS_IS_CONTAINER_ID_YOU_CHECKED_ABOVE]</key>
<dict>
<key>NSUbiquitousContainerIsDocumentScopePublic</key>
<true/>
<key>NSUbiquitousContainerName</key>
<string>[THIS_IS_THE_NAME_SHOWED_IN_ICLOUD_DRIVE]</string>
</dict>
</dict>